Tag Archives: java

android-galaxyzoo: Fixing typical Android bugs

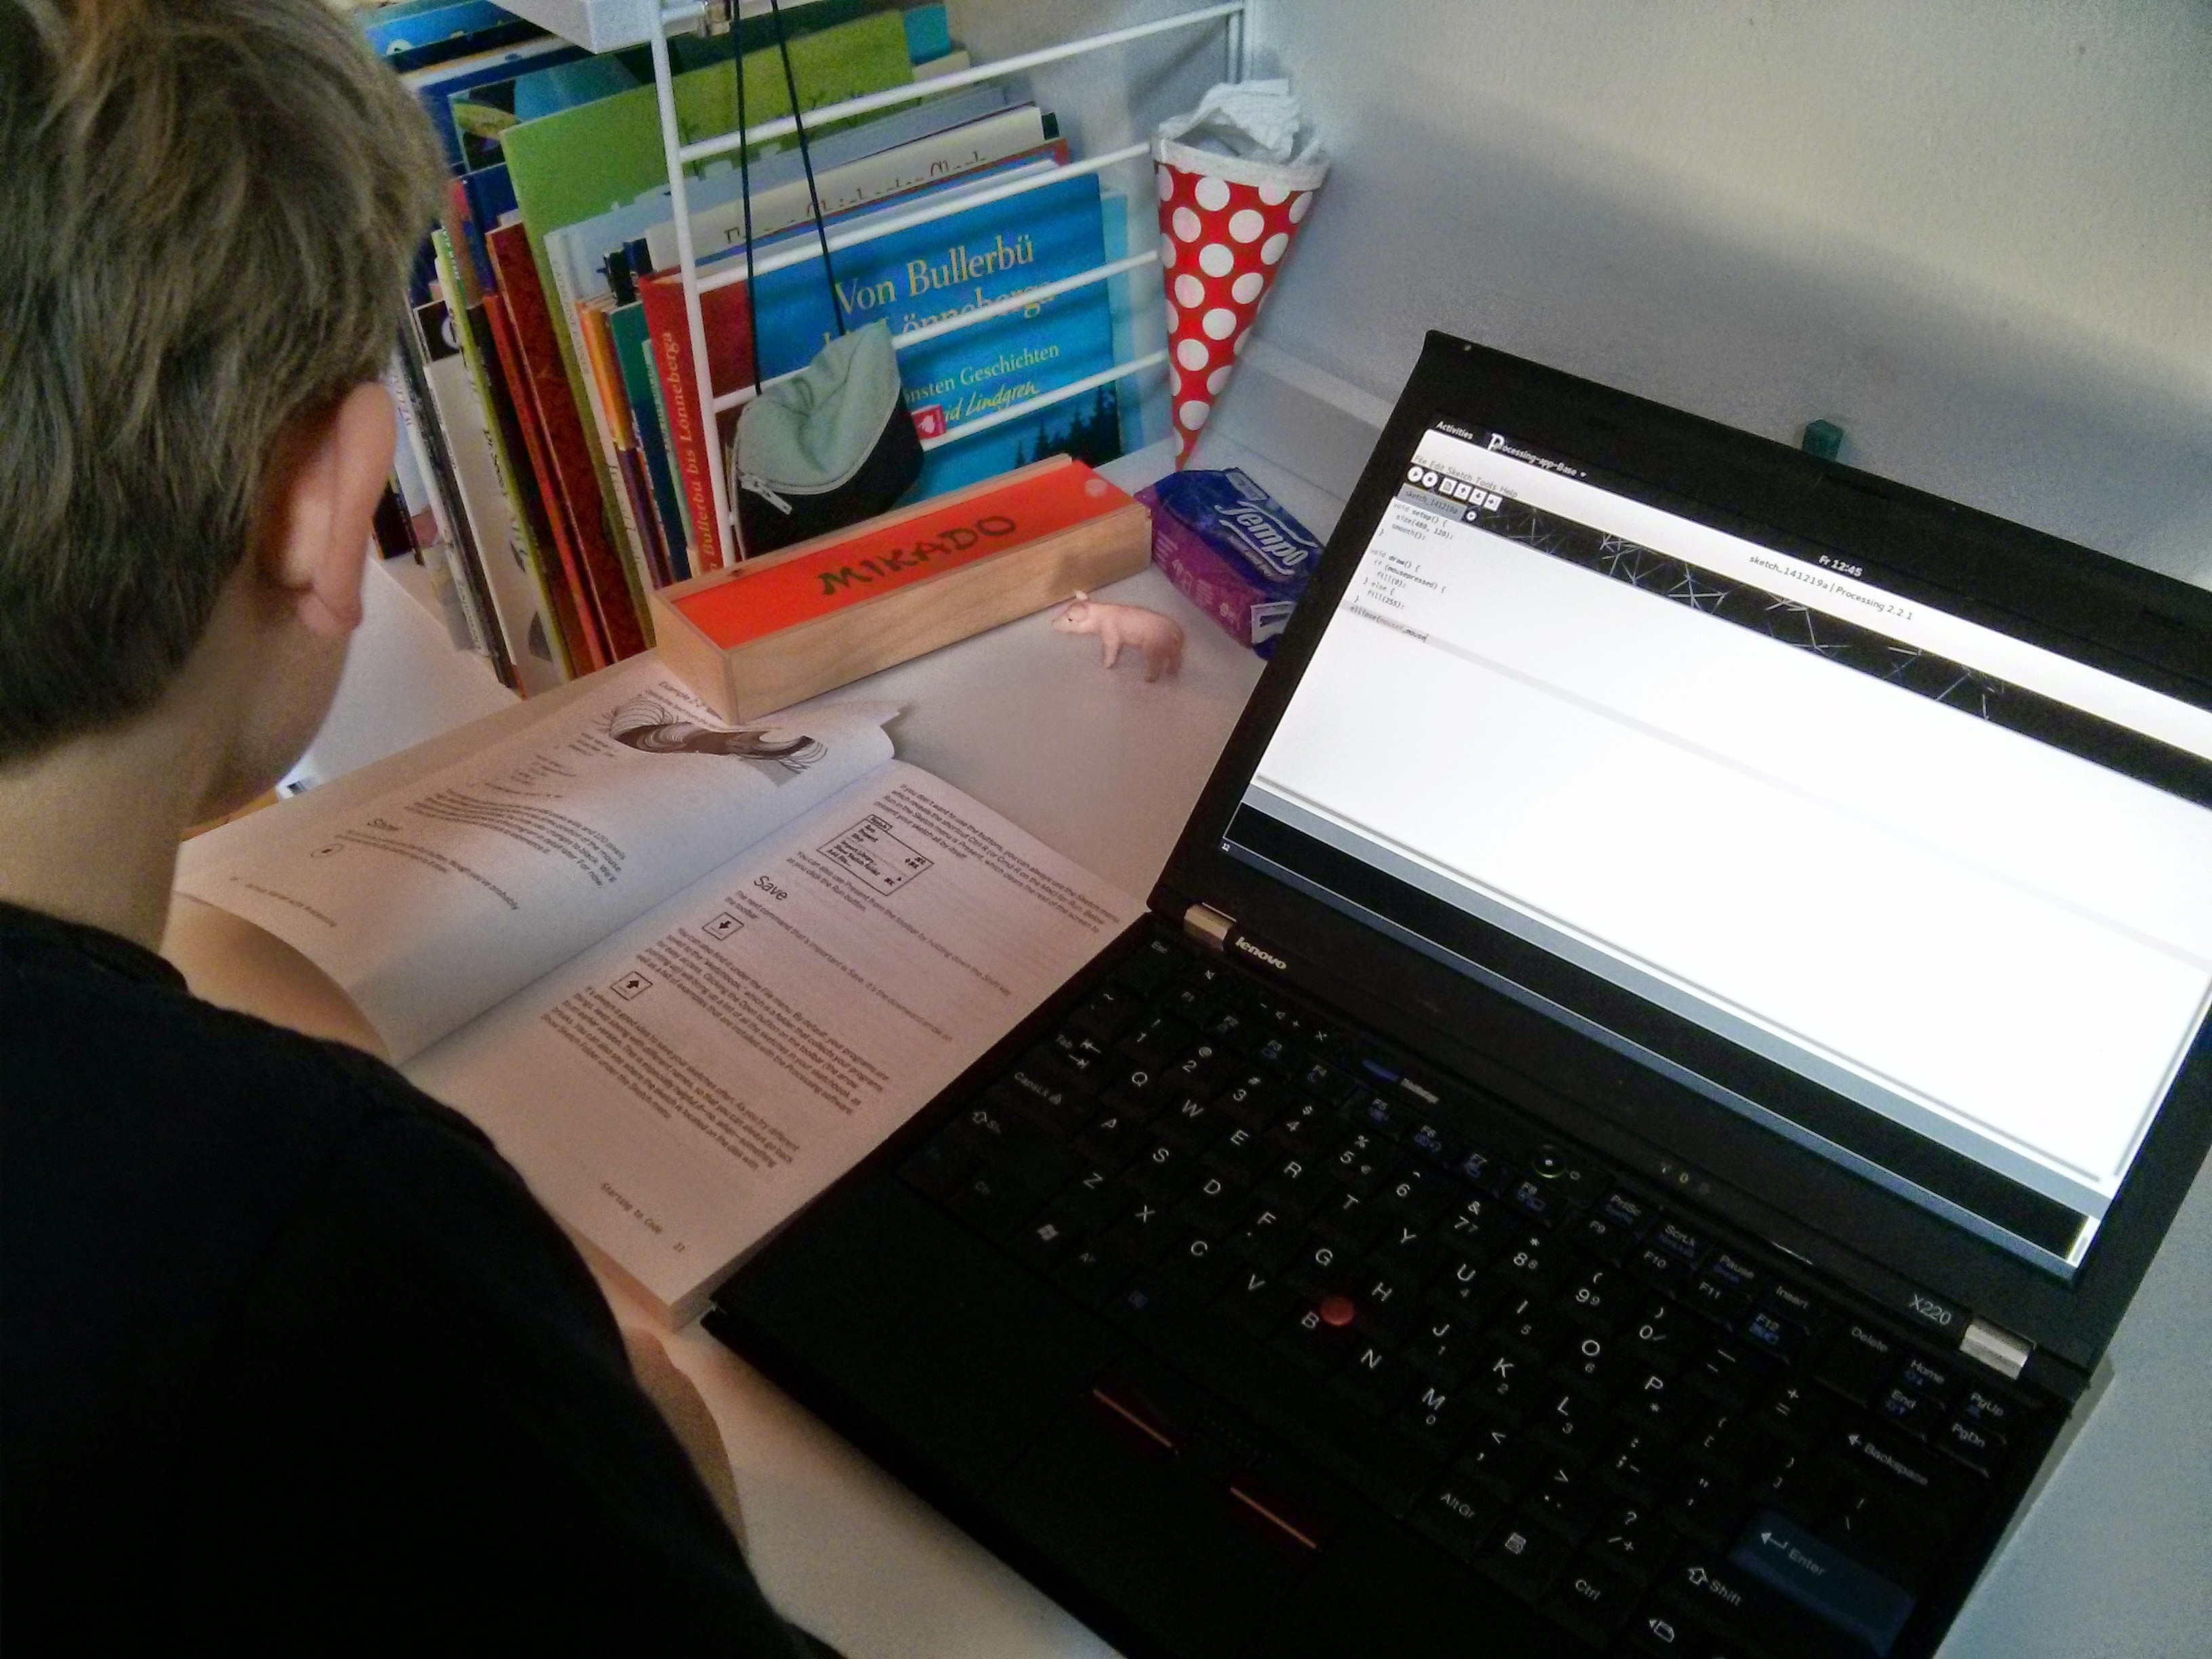
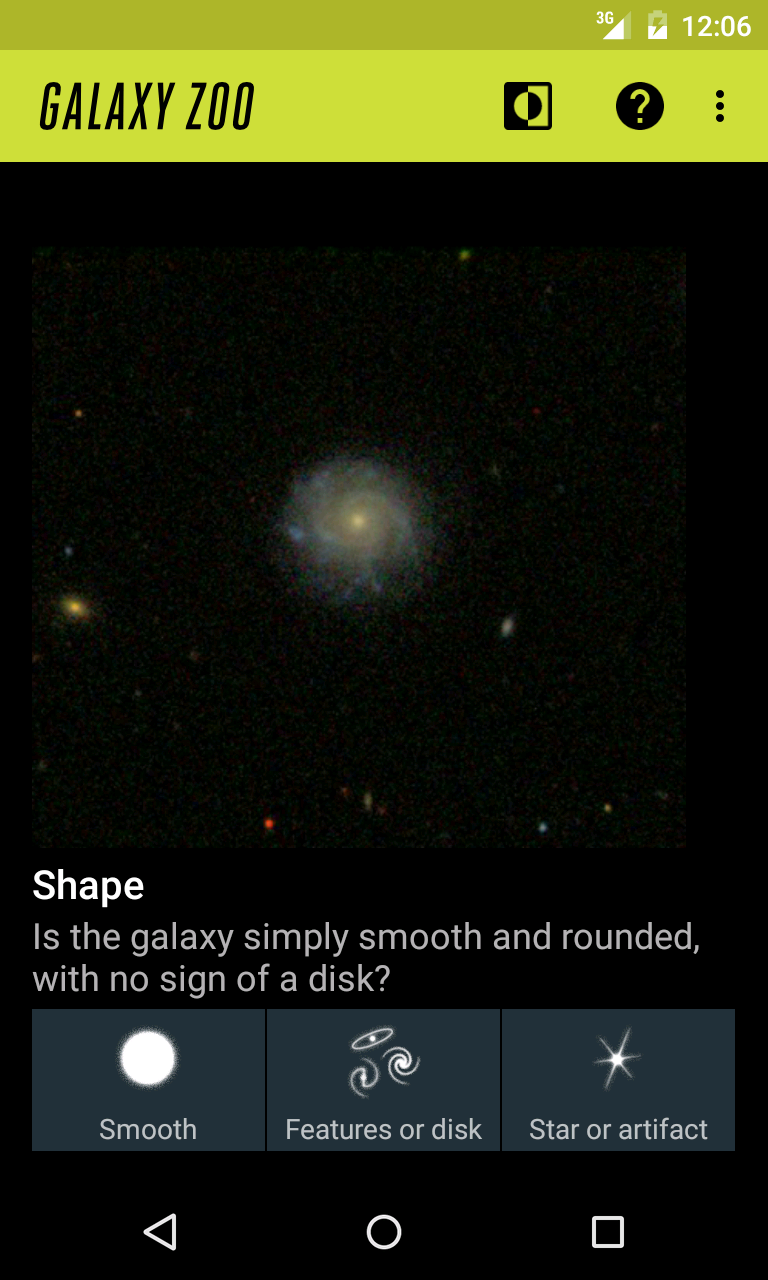
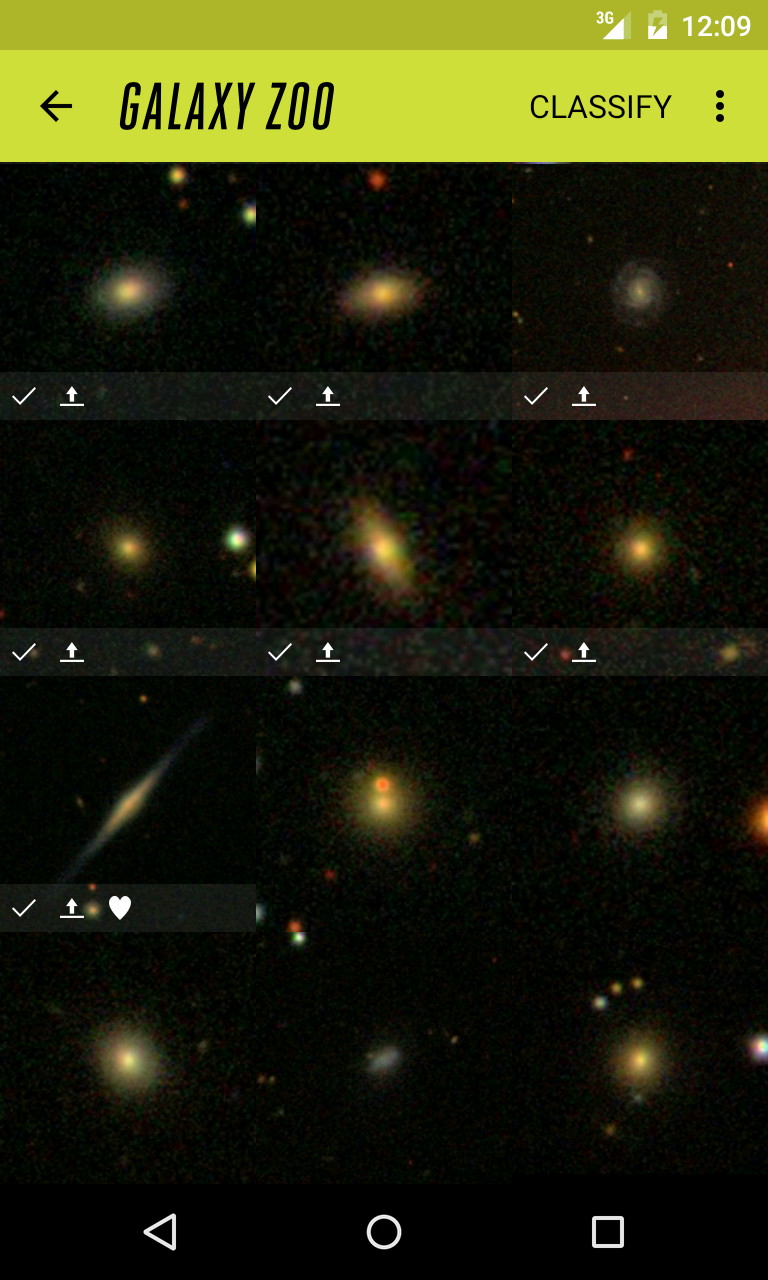
My Galaxy Zoo app for android has been on the Play store for several months now and seems to be generally well liked. So far it has around 800 users, increasing slowly and linearly, probably because it isn’t linked from the galaxyzoo.org website. But even the first hundred users were enough to show me several problems that I needed to fix. I’ve written about them here, with links to the commits that fixed them in my app, because other app developers will experience them too.

These were general Android development problems, not specific to android-galaxyzoo. I guess that this is the difference between someone who understands how the Android API should be used, and someone who has actually used it with real users. It shouldn’t be quite this difficult.

Work in the main thread (Strict Mode)

Your code should not perform long-running tasks, such as network or disk IO, in the main thread, because UIs should not be unresponsive. By enabling Strict Mode in your code, you can make this cause exceptions, turning a non-responsive app into a crashing app. It would be unwise to turn this on in your app’s release version.

However, some “power” users seem to have this on via the developer options. They probably experience instability in many apps. And Android 3.0 (Honeycomb) has some Strict Mode settings on by default. So you will get crash reports via the Google Play store if you ignore Strict Mode exceptions.

As I mentioned in my previous entry, AccountManager is documented as being safe for use on the Main UI Thread, but it’s not, so I needed to use the AccountManager via AsyncTask.

If you are using a ContentProvider, you should not try to store data in the ContentProvider in the main thread. I instead did that via AsyncTask.

Likewise, avoid calling BitmapFactory.decodeStream() in the main thread, though it’s easier to just use Picasso anyway.

Automatic cache deletion

Your app probably caches some data, such as images, in its cache directory, such as the getExternalCacheDir() directory (/storage/sdcard/Android/data/com.you.yourapp/cache). However, Android will delete those files whenever it needs the space, and it won’t explicitly tell your app that it’s happened. So you need to check that your cached files really exist, one by one. You can either check the files when you first try to use them (causing UI delay) or you can check in the background, maybe trying to re-download the files.

This confused my code completely and it was hard to identify the cause of the resulting bug because the cache deletion by the system was not triggered by any particular action in my app.

By the way, although the getExternalCacheDir() documentation says that you don’t need to request permission to use that (app’s own) directory since Android 4.4 (KitKat), that’s not true – you do need to request the permission on Android 5.0 (Lollipop).

IllegalStateException: Can not perform this action after onSaveInstanceState

There are things that you cannot do in between an activity’s state being saved and that activity being resumed. It’s hard to know when that is the case but if you get it wrong then your app will crash. Here’s a full explanation, though you’ll wish you didn’t have to bother with it.

For instance, you should delay any use of AlertDialog until the parent activity’s onResumeFragments, which I did like so.

Likewise, you should not commit fragment transactions until after your activity has resumed. Again, its best to cause the commit of the fragment transaction in the parent activity’s onResumeFragments() because there’s nowhere suitable to do that in the fragment. The code could be much simpler if there was just somewhere safe in the Fragment to do this.

I believe that this problem hits every Android app developer who ever had more than a handful of users. It feels like a failure in the Android API design and the fixes feel like workarounds. If there was any clear way to structure app code to avoid this from the start then that would be mentioned early in the developer documentation.

Mutiple onLoadFinished() calls

If you use a ContentProvider (as I think you should) then you’ll use a Cursor Loader to get its data, overriding onCreateLoader() and onLoadFinished() and calling getLoaderManaged().restartLoader().

However, you will notice that your onLoadFinished() is often called more than once, sometimes with older data, confusing your app. This can be avoided by calling getLoaderManager.destroyLoader() in your onLoadFinished. For instance. I’m fairly sure this is an Android bug – at the least it is a poorly documented and unforgiving aspect of the API.

ConcurrentModificationException

I had at least one crash report with a ConcurrentModificationException, suggesting that two threads were changing the same data at the same time though I thought I had designed my code to avoid that and I thought I had made the class mostly immutable. So to avoid any chance of sharing data between threads I did some defensive copying (and here). I haven’t seen the crash since.

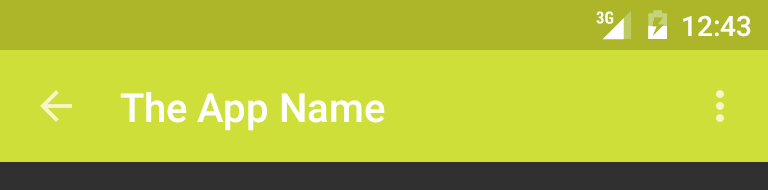
Toolbar’s Up button doesn’t act like the Back button

Android has a standard Back button that most users understand. It generally takes the user to the previous screen (activity), and that previous screen will look like it last looked for them.  But Android also has the concept of an Up button which few users understand.

The Up button is usually at the left of the app’s top toolbar (appbar) and it usually looks like a Back button. But it’s not a Back button. It takes the user to the parent level of the app instead of stepping back through all the previous screens that the user has traveled through since they were last at the top-level. Of course, most users don’t have any concept of the app having a hierarchy of screens in addition to a history of sibling screens. I predict that the Up button idea will be removed from Android one day.

At a second-level activity (something opened from the top-level), a user can justifiably expect the Back button and Up button to have the same effect – take me to the previous (top-level) screen/activity – even if the user knows about the Back/Up difference. However, by default the Up button will start a new parent activity instead of going back to the previous instance of that activity (as Back would). Users experience this as a loss of data – for instance this bug and this bug.

The fix for this depends on the situation:

Duplicated child fragments

My app uses child fragments (fragments in a fragment), which Android needs us to add in code rather than in the layout XML file. Strangely, I sometimes saw duplicate fragments thought it was hard to reproduce it reliably. The answer was to  always use FragmentTransaction.replace() instead of add().


Galaxy Zoo Android app: New Surveys

The web-based Galaxy Zoo has switched to showing subjects from two new surveys, with new sets of questions for these surveys. So I’ve updated (see in github) the Android app too and the new version is now available in the play store. These new images are less clear, and the questions are a little harder to answer. Apparently some clearer images are on the way.

Unfortunately, though the data comes from the server, all of the decision trees, icons, help text, and example images need to be in the client – The web client and the Android app at the moment. I’ve written a small text document describing how to change the surveys used by the Galaxy Zoo Android app. It should be easier, but for now documented-and-awkward is better than not-documented-and-awkward.

Looking for Work

I’ve really enjoyed the past year or so of “sabbatical”, learning new skills, doing some hobby projects, and spending more time with my kids, but it’s time to look for a proper job again. I suspect I’ll do some freelancing for a while until I find something suitable.

I’m hoping to find something still in the Linux and open source world, maybe moving into Android, and maybe with some management. I enjoyed running Openismus so I hope I can continue doing something similar: managing multiple small teams of highly skilled software developers who work with open source code and collaborative open source methods, while still doing some software development myself. I’d like to continue working with people with such high standards.

I don’t expect this to be easy because:

  • I want to stay in Munich.
  • I’d really like part time or flexible (start early, leave early) hours so I can spend some of the afternoon with my kids.
  • Running Openismus gave me project management experience, but I’m not sure it’s given me enough to call myself a manager rather than a programmer, and I don’t want to stop being a programmer.
  • GTK+ (and gtkmm) experience is apparently no longer such a popular niche. Qt still is but I’m less enthusiastic about it.
  • C++ is still broadly popular, but I’d like to stay away from MS Windows development.
  • I’ve really enjoyed doing Java Android development recently, but I hesitate to call myself an expert Java developer, compared to my C++ skills. Then again, if most Java developers are as bad as most C++ developers, then I must be better than most.
  • Although I’m learning some Algorithm analysis theory at the moment for fun, it doesn’t greatly interest me and I’ve never needed it over the last 20 years. But it seems to have become a popular interview filter.
  • I’m still not a Kernel developer and I still don’t really want to be. I like creating libraries, tools, and user experiences.

Here’s my CV if you think I can be useful.

Processing for Kids

Liam (7) has been playing a little recently with Processing, mostly drawing shapes and moving them around. The Hello Processing interactive video tutorial is an excellent introduction, for kids too. Thanks to Jon Nordby for suggesting Processing.

Liam is gradually working through the Getting Started with Processing book, typing in example code and changing it as the book suggests. Previously he has used Scratch and he’s started using the Lego Mindstorms programming environment, which is surprisingly visually complicated. But Processing is a nice introduction to real text-based programming, where you must type everything perfectly correctly or the computer will complain with incomprehensible error messages.

So far this seems to be the closest modern-day equivalent to my childhood experiences of sitting down with a Sinclair ZX81, Spectrum, or BBC Micro and trying things out from a book on BASIC. The expectations are low so you can easily feel that you’ve achieved something significant.

IMG_20141219_124554

The Processing IDE is a very simple and obvious UI and a Processing hello-world can be just one line, without any platform initialization, without specifying anything about exactly where your output should appear:

line(15, 25, 70, 90);

By default there’s just one screen that you draw on, and all functions and types appear to be in a global namespace. So you can start making things happen without the distraction of boilerplate code and without figuring out where in that mess to put your own code. You don’t need to learn about objects, inheritance, or encapsulation, though of course you should later.

Writing an iPhone or Android app might seem more interesting to modern kids, but they’d have to wade through so much kibble just to get started, while always noticing how far they are from achieving anything like the existing apps they see.

Processing is actually Java. When you write code, that code then seems to be the contents of a method in a (derived?) PApplet class, though you don’t see that other than in some compiler error messages. The functions such as size(), stroke(), point(), ellipse(), color(), strokeWeight(), etc, are actually member methods of this class. You don’t need to import any Java classes to use this API.

Java is fairly forgiving, particularly for the simple examples that people will start with. And it  offers a nice route into object orientated programming without the lower-level pain of C or C++.

Instead of just writing a bunch of code to run and then stop, you can instead define (override) setup() and draw() functions that do what you’d expect. The draw() method can make use of member variables such as mouseX and mouseY (these are not parameters of draw()). Likewise, you can implement keyPressed() and make use of keyCode. So you get a simple introduction to making a program interactive by doing event-driven programming.

Processing is not perfect, and I think you’d feel the lack of a real API and IDE as soon as your project became more serious, but it’s a great introduction to real programming.

android-galaxyzoo: Superficial porting to Android 5.0 (Material design)

Here are some notes about my experience adapting android-galaxyzoo to Material design for Android 5.0 (Lollipop) though I only used the most superficial parts of Material design.

AppCompat v21

Android 5.0 (Lollipop) has a new UI theme and some new APIs. However, for the next few years, almost everyone will use the slightly awkward AppCompat v21 compatibility API instead to achieve most of the same behavior on older devices too. Chris Banes wrote up a nice overview of AppCompat v21, some of which I mention here again for completeness.

I’m using Gradle, as should you, so I added this to the dependencies block in my app/build.gradle file. You’ll want to use the latest version.

compile "com.android.support:appcompat-v7:21.0.3"

Theme

First, I switched from the dark Holo theme to the (AppCompat) dark Material theme by changing the parent theme in my styles.xml. See the Toolbar section below about the use of the “.NoActionBar” versions of these themes.

- <style name="AppTheme" parent="android:Theme.Holo">
+ <style name="AppTheme" parent="Theme.AppCompat.NoActionBar">

If you were using the light theme, that would be:

- <style name="AppTheme" parent="android:Theme.Holo.Light">
+ <style name="AppTheme" parent="Theme.AppCompat.Light.NoActionBar">

Note that we don’t use the android: prefix with the AppCompat theme, because the theme is being bundled directly into our app via the appcompatv21 library.

I then specified  the standard colorPrimary and colorAccent colors along with some more shenanigans to get the right text and icon colors in my toolbar.

I also used the TextAppearance_AppCompat_* widget styles instead of the regular textAppearance* style attributes, because it’s recommended in the Typography section of this official “Implementing Material Design in Your Android app” blog entry. However, I didn’t notice any difference in appearance, and I wonder why we wouldn’t just get the correct styles by just using the new overall theme.

I actually created a base style and two derived styles, to support Transitions – see below.

Toolbar

The new Toolbar widget replaces the ActionBar, though the documentation doesn’t actually say that yet. Generically, they are called the “App Bar” in the Material Design document. I’m not sure that I really got any benefit from using it because my App Bar doesn’t do anything special, but I wanted to use the latest API.

To use Toolbar instead of ActionBar,  you should derive from the .NoActionBar version of the theme, such as Theme.AppCompat.NoActionBar, though I used the regular Theme.AppCompat for a long time without noticing any difference.

Then you’ll want to add a Toolbar widget to the Layout XML files for every activity. I did that by creating a toolbar.xml file

<?xml version="1.0" encoding="utf-8"?>

<android.support.v7.widget.Toolbar
    xmlns:android="http://schemas.android.com/apk/res/android"
    xmlns:app="http://schemas.android.com/apk/res-auto"
    android:id="@+id/toolbar"
    android:layout_width="match_parent"
    android:layout_height="wrap_content"
    android:background="@color/color_primary">
</android.support.v7.widget.Toolbar>

and then I just including that from all the activity layouts like so:

<include layout="@layout/toolbar" />

I also specified the app:theme and app:popupTheme to get the right text and icon colors in my toolbar.

To use this toolbar as the App Bar, you need to derive from ActionBarActivity and call its setSupportActionBar() method. I did that in a utility function, like so:

Toolbar toolbar = (Toolbar) activity.findViewById(R.id.toolbar);
activity.setSupportActionBar(toolbar);

RecyclerView

Android 5.0 adds the RecyclerView widget, available for older API levels via the support.recyclerview library. For instance, I added this to the dependencies block in my app/build.gradle file. You’ll want to use the latest version.

compile 'com.android.support:recyclerview-v7:21.0.0'

RecyclerView apparently replaces ListView and GridView, though the documentation doesn’t yet actually say that, adding confusion for new developers. I replaced my use of GridView with RecyclerView to get support for simple Material Design transitions.

Unfortunately, RecyclerView has no real cursor support, so it’s hard to use it to view data from a ContentProvider. This is particularly annoying because the API of ListView and GridView previously pushed us towards moving code into a ContentProvider. My own Cursor-based RecyclerView.Adapter is terribly inefficient and totally unsuitable for a large number of items.

There’s an awful lack of practical documentation or example code for RecyclerView, even for simple tasks like responding to a click. Until there’s an easier way, you’ll need some tedious boilerplate code to derive your RecyclerView.ViewHolder from View.OnClickListener and call setOnClickListener() on one of your child views.

Transitions

I wanted the typical move-and-scale transition that we see in Material Design apps, so that clicking on one of many items makes its image expand and move into the subsequent detail activity, and shrink back again when you go back.

To achieve this, I had to specify various settings in my theme, but only Android 5.0 (Lollipop) devices support these transition items, so I created a base theme in res/styles.xml, and derived from it:

<?xml version="1.0" encoding="utf-8"?>
<resources>

    <style name="AppTheme" parent="AppTheme.Base" />

    <style name="AppTheme.Base" parent="Theme.AppCompat.NoActionBar">
        <item name="colorPrimary">@color/color_primary</item>
        ...

I then created a styles.xml file just for API Level 21, by putting it in res/v21/styles.xml, where I derived from the base theme again:

<?xml version="1.0" encoding="utf-8"?>
<resources>
    <style name="AppTheme" parent="AppTheme.Base">
        <item name="android:windowContentTransitions">true</item>
        <item name="android:windowAllowEnterTransitionOverlap">true</item>
        <item name="android:windowAllowReturnTransitionOverlap">true</item>

        <!-- specify shared element transitions -->
        <item name="android:windowSharedElementEnterTransition">
            @transition/change_image_transform</item>
        <item name="android:windowSharedElementExitTransition">
            @transition/change_image_transform</item>
    </style>
</resources>

I then defined that change_image_transform transition in my res/transition/change_image_transform.xml file, like so:

<?xml version="1.0" encoding="utf-8"?>
<transitionSet>
    <changeBounds/>
    <changeImageTransform/>
</transitionSet>

To actually use this transition on images, I needed to specify the android:transitionName on the two ImageViews in the the layout XML files for the two Activities (Fragments in my case).

Mostly this was all voodoo which I put together gradually after finding clues scattered around the internet. I haven’t found a good official example that shows this.

Unfortunately, the transition doesn’t seem to work when the user presses the Up button on the toolbar instead of using the standard Back button, even though that’s indistinguishable from Back for most users in most activities.

Metrics and Keylines

I made a fair effort to adapt my margins and padding to fit in with the Material Design Metrics and Keylines, which wasn’t too hard.

Unfortunately, the standard Android Button’s appearance is just as usless for Material design as it was for the Holo theme. It has a fake margin around its inside edges, which is part of its background graphic rather than any adjustable margin or paddng property.

So, to make the button’s sides actually flush with other widgets, and to position them properly on the layout grid, I had to specify a custom background image or color. But then I lost the nice Material Design ripple effect. I hope someone knows how to do this properly.

Activity classes without Toolbar support

There are a few helpful derived activity classes, such as AccountAuthenticatorActivity and PreferenceActivity, but these haven’t been changed to derived from ActionBarActivity, so you can’t call setSupportActionBar() on them. They can’t be changed without breaking compatibility, so you’ll have to reimplement them in your code. It’s not a lot of code but it’s an unpleasant developer experience.


android-galaxyzoo: Network I/O and UI responsiveness

While developing the Galaxy Zoo app for Android, I experienced problems with UI responsiveness while the app was downloading from, or uploading to, the remote server. I don’t mean just the usual problems caused by doing network I/O or file system access in the UI thread – mistakes that can often be caught by using Strict Mode. I mean that buttons didn’t respond to presses if the app happened to be doing I/O in an AsyncTask.doInBackground().

I solved this problem, but it was an incredibly frustrating journey. These notes might help the next person. So many Android apps are just a fancy way to interact with a website’s data, caching it locally, but the regular Android API doesn’t make that easy enough.

My app uses a ContentProvider, because the Android API seems to point us towards doing so, as I found while creating my experimental Android Glom app. The ContentProvider usually runs in the same process (and thread) as the main UI, so I don’t think this architecture was a cause of the UI responsiveness problem.

Thread+ResponseHandler versus AsyncTask

My ContentProvider needed to communicate with the remote server via REST messages, downloading images from the URLs that it then discovered and caching those images locally as well as storing data in its SQLite database. At first, I used the Thread class directly, with a UriRequestTask class derived from Runnable, that used HttpClient and accepted a (HttpClient) ResponseHandler. This was based on the example code in O’Reilly’s Programming Android (2nd Edition) book, in its “A Content Provider as a Facade for a RESTful Web Service” chapter (which you can see some of here).

Later, before I found the UI responsiveness problem, I replaced this Thread and RequestTask idea with AsyncTask because that seemed more robust and made it easier to get a result back to the main thread. I didn’t understand why the “Programming Android” book didn’t use AsyncTask in its ContentProvider. Yet later, I found that Strict Mode didn’t allow that use of AsyncTask in a SyncAdapter’s non-UI thread on some older devices (API version <15), causing an ExceptionInInitializerError with “Can’t create handler inside thread that has not called Looper.prepare()”. Maybe the authors found the same problem.

HttpURLConnection instead of HttpClient

Incidentally, I later realized that the Android developers now discourage use of HttpClient, because their version of HttpClient is buggy and they can’t update it without breaking compatibility. So I changed from HttpClient to HttpURLConnection (and here and here). Luckily, this fixed the endless redirect problem I (like others) was having with my uploads.

Again, I felt led astray by the “Programming Android” book, but books get out of date very quickly and the Android documentation apparently gives us new clues only reluctantly. Hopefully the 3rd edition will improve this.

Avoiding the user

This is when I noticed the UI responsiveness problem. I tried using Thread directly in various ways instead of AsyncTasks, fearing my own changes had caused it, but it made no difference.

I tried all kinds of tricks to avoid doing any I/O, even in the AsyncTasks, when the user was likely to be using the UI, trying to wait until it seemed that the user was idle and then doing some quick I/O before getting out of the way again. But the user is unpredictable and would still try to press a button now and then exactly when my app was doing some sneaky I/O.

After lots of imprecise testing, I was fairly sure that the problem was worse when the app happened to be doing some filesystem I/O, even just writing to the SQLite database, but it was definitely caused too by doing network I/O of even small JSON files. We should expect disk I/O to be worse than network I/O, of course.

SyncAdapter

I wanted to learn about Android’s SyncAdapter framework anyway, so I spent a week figuring that out despite its awful hand-wavy documentation. Luckily, it fixed the UI responsiveness problems. I think it helped partly because the I/O was now in a separate process, though that doesn’t feel like it should be necessary. Also, the SyncAdapter framework can decide when best to let the SyncAdapter do its work, based on the whole system. Presumably it can then prevent unrelated processes from making the UI responsiveness even worse.

Unfortunately, using SyncAdapter does mean that I lose control over when I may download items in advance. For instance, I often find that a new install of the app doesn’t fill up its initial list of ten items until five or ten minutes after the first start. In the meantime, the app requests the items directly when necessary. I call ContentProvider.requestSync(), with SYNC_EXTRAS_MANUAL, when I’m sure there’s work for the SyncAdapter to do, but it just seems to take this as a suggestion that it’s free to ignore.

Authenticator and Account

To use the SyncAdapter, I had to create an Authenticator, for which I needed an Account type, even if you are accessing your server anonymously. This account type will show up in the Settings->Accounts UI. Presumably this is why some other apps show up in the Accounts Settings, even though they don’t need any login. Maybe they are doing it just so they can use SyncAdapter.

SyncAdapter versus SharedPreferences/PreferenceFragment

So I started by storing the login details via the AccountManager instead of via SharedPreferences. I later discovered that the app’s SharedPreferences (such as how many items to download) were unavailable to the SyncAdapter’s separate process. That is documented as “currently this class does not support use across multiple processes“. So I later put other preferences in the account too. Unfortunately, the standard settings/preferences UI only uses SharedPreferences, so I have hacky code to keep the SharedPreferences and the Account in sync – see my onSharedPreferencesChange() override in my PreferenceFragment, so the account’s UserData is changed when the standard settings UI is used, via my hacky copyPrefToAccount method.

AccountManager versus main/UI thread

I also later found that you can’t use the AccountManager API from the main UI thread even though the documentation says things like “It is safe to call this method from the main thread”. The Firefox on Android developers discovered this too (1, 2, 3). So I moved that code to an AsyncTask (for example). If you don’t then you’ll get StrictMode exceptions at least on API level 15 and 16 – maybe others. StrictMode seems to have been on for Android Honeycomb, and some users seem to enable StrictMode, so you will see this as crash reports on some devices.

Volley

I also wanted to try out the Volley library. This isn’t an official part of the Android API. For instance, there’s not even an official way to add it as a dependency – I used the Volley package that mcxiaoke helpfully published to maven central. But Google use Volley in some of their own apps and they recommend Volley in the Android documentation. The video linked from there is well worth watching.

When I rewrote my HttpURL Connection-using code with Volley it seemed to make my downloads noticeably faster, probably because it avoids doing I/O in too many threads simultaneously. This was an easy win.

I couldn’t use Volley for my uploads, unfortunately, because Volley uses HttpClient on older Android versions whose HttpUrlConnection wasn’t good enough yet, causing the old endless-redirect problem again. So I use HttpURLConnection directly for that.

Picasso

I also switched to using Picasso to fill ImageViews with bitmaps from our ContentProvider or directly from the internet, instead of my own AsyncTask. This simplified the code and gave me some extra caching, particularly simplifying my ListView/RecyclerView adaptor that previously had its own custom LruCache. For instance 1, 2, 3. Image loading just generally felt much faster everywhere that I used Picasso, though I don’t know exactly why.

Just filling an ImageView without blocking the UI seems like something unexciting that the Android API should already make easy.

Galaxy Zoo for Android

I just released my Galaxy Zoo android app to the Google Play store. The Zooniverse team have adopted it as their official Galazy Zoo app for Android.

Like the Galaxy Zoo website, it asks you questions about a picture of a galaxy, with each question depending on the previous question. This “Citizen Science” helps astronomers to analyze the huge amount of images of galaxies provided, for instance, by the Hubble Space Telescope. There are several other Zooniverse projects, though most require more thought and have more complicated user interaction.

screenshot_nexus4_api21_classify_first screenshot_nexus4_api21_list

I have already released several beta versions to a handful of helpful testers, but now I’m nervous about it being publicly available. I’d rather not be bombarded with one-star reviews if there’s a bug I haven’t caught yet or if people don’t like something about the questions themselves.

There was a previous Galaxy Zoo android app that I think was in use until around 2012, but it stopped working with the latest version of the server and apparently wasn’t updated. It’s no longer available from the Google Play store. This new Galaxy Zoo android app is open source on github, so it should have more future. For instance, that would let other developers investigate problems if there are server changes, even if I don’t (though I would). Patches and pull requests are very welcome. There are even a few minor issues that I’d already like help with.

I’ve been working on this for the past few weeks, using it as a real-world exercise to learn about Android development, trying to do everything properly. I’ve enjoyed diving into something new, and it feels good to have gained the experience. However, Android development ultimately feels just as awkward as every other development environment I’ve ever worked with – no more nor less. I’ll write some follow-up blog entries about the technical parts of the adventure.


Android: Changing action icon colors with Android 5.0’s drawable tinting

Android 5.0 (Lollipop), which is API version 21, supports tinting of drawables. So now you don’t need to recreate your monochrome action icons (in multiple sizes) just to show them in a different color in your app bar (ActionBar or ToolBar).

Unfortunately, drawable tinting isn’t available via the AppCompat library. That makes it useless for now unless you want to target only Android 5.0 devices, but here’s how to use it anyway. One day Android 5.0 might be old enough.

This is another part of my adventure in changing the color of stuff in Android’s app bar, after already figuring out how to change the color of the app bar’s text and standard icons.

Regular Drawables

Normally you’d just have the regular multiple .png files for your action item like so:

res/drawable-hdpi/ic_action_something.png
res/drawable-mdpi/ic_action_something.png
res/drawable-xhdpi/ic_action_something.png
res/drawable-xxhdpi/ic_action_something.png
res/drawable-xxxhdpi/ic_action_something.png

You would use these in your layout XML like so:

<item
    android:id="@+id/option_menu_item_something"
    android:icon="@drawable/ic_action_something"

Or you would use them in code like this:

menutem.setIcon(android.R.drawable.ic_action_something);

Tinted Drawables

You can now add a tinted version of the existing drawable like so:

res/drawable/ic_action_something_tinted.xml

With XML contents such as this:

<?xml version="1.0" encoding="utf-8"?>
<bitmap
    xmlns:android="http://schemas.android.com/apk/res/android"
    android:src="@drawable/ic_action_something"
    android:tint="@color/color_action_icons_tint"/>

That color_action_icons_tint could be hardcoded, but you’ll want to use the same one repeatedly via a color resource, like so:

res/values/color.xml

With XML contents like this:

<?xml version="1.0" encoding="utf-8"?>
<resources>
    <color name="color_action_icons_tint">#5a6518</color>
</resources>

You can then refer to that tinted drawable just like any other drawable,

in your layout XML like so:

<item
    android:id="@+id/option_menu_item_something"
    android:icon="@drawable/ic_action_something_tined"

or in code like this:

menutem.setIcon(android.R.drawable.ic_action_something_tinted);

Android: Changing the Toolbar’s text color and overflow icon color

Light on Dark and Dark on Light.

Android’s has normal (dark) and light themes, though it’s actually the light themes which are normally show in examples of the new Material design.

The light theme expects your App Bar1 (Toolbar or ActionBar) to have a light background color, so it gives you a dark title and dark overflow menu icon (the three vertical dots):

screenshot_toolbar_light_theme_default_cropped

The dark theme expects your App Bar to have a dark background color, so it gives you a white title and white overflow menu icon:

screenshot_toolbar_dark_theme_default_cropped

This is true of both the Holo themes and the new Material themes.

If you want to use the light theme but want your App Bar to have a dark background, or use a dark theme and want your toolbar to have a light background, things get awkward. Arguably this might be unwise design anyway, but there’s nothing in the Material design guidelines advising against it.

It’s fairly easy to change the ActionBar‘s text color, but changing the color of its overflow icon is harder. It seems normal to provide a whole new overflow icon for your app, replacing the standard one, just to get the right color.

Android’s new Toolbar, which replaces ActionBar (with some awkward code), makes it easier to change the title text color and the color of the menu overflow icon (and the Up/Back icon). So now I finally have dark text and icons on my light background in the dark theme:

screenshot_toolbar_dark_text_on_light_with_dark_theme_cropped

Toolbar theme and popupTheme

It took me ages to figure out how to do this, so hopefully the following explanation saves someone some time. I’d welcome any corrections.

My main theme derives from Theme.AppCompat (not Theme.AppCompat.Light), which is the dark Material theme for older devices, because I want most of the UI to be dark.

<style name="AppTheme" parent="AppTheme.Base" />
<!-- Base application theme.
     Defining this lets values-v21/styles.xml reuse it with changes. -->
</style>
<style name="AppTheme.Base" parent="Theme.AppCompat.NoActionBar">  
  <!-- colorPrimary is used, for instance, for the default ActionBar
       (but not Toolbar) background.
        We specify the same color for the toolbar background in 
        toolbar.xml.. -->
  <item name="colorPrimary">@color/color_primary</item>

  <!-- colorPrimaryDark is used for the status bar (with the
       battery, clock, etc). -->
  <item name="colorPrimaryDark">@color/color_primary_dark</item>

   <!-- colorAccent is used as the default value for
        colorControlActivated which is used to tint widgets. -->
  <item name="colorAccent">@color/color_accent</item>
</style>

(Update: I originally used Theme.AppCompat, manually setting windowActionBar to false, before learning of Theme.AppCompat.NoActionBar here, but I don’t notice any difference)

But that dark theme gives me light text and icons on the my light background of the App Bar:

screenshot_toolbar_standard_white_text_on_light_with_dark_theme_cropped

I want to use a light color for the toolbar background even while using the dark theme.  So I’ll need to make the text and icons on my toolbar dark instead of the default white from the light theme. Incidentally, the Material Design Color Palette page seems to agree with me, using dark title text on the Lime color I’ve chosen, but using white on almost all other colors.

So my Toolbar’s XML layout specifies a different theme (android:theme, or app:theme when using appcompat versions before 22.1.0), like so:

<android.support.v7.widget.Toolbar
  xmlns:android="http://schemas.android.com/apk/res/android"
  xmlns:app="http://schemas.android.com/apk/res-auto"
  android:id="@+id/toolbar"
  android:layout_width="match_parent"
  android:layout_height="wrap_content"
  android:background="@color/color_primary"
  android:theme="@style/GalaxyZooThemeToolbarDarkOverflow"
  app:popupTheme="@style/Theme.AppCompat.NoActionBar" />

That toolbar theme specifies a textColorPrimary and textColorSecondary to change the color of the title text and of the menu overflow button. You could just specify the standard Theme.AppCompat.Light.NoActionBar theme for the toolbar, to get the dark text and overflow icon,  but I wanted to derive from my own theme and make only small changes, because I have no idea what else might be affected.

<style name="GalaxyZooThemeToolbarDarkOverflow" parent="Theme.AppCompat.NoActionBar">
  <!-- android:textColorPrimary is the  color of the title text
       in the Toolbar, in the Theme.AppCompat theme:  -->
  <item name="android:textColorPrimary">@color/abc_primary_text_material_light</item>

  <!-- android:textColorPrimaryInverse is the  color of the title
       text in the Toolbar, in the Theme.AppCompat.Light theme:  -->
  <!-- <item name="android:textColorPrimaryInverse">@color/abc_primary_text_material_light</item> -->

  <!-- android:actionMenuTextColor is the color of the text of
        action (menu) items in the Toolbar, at least in the
        Theme.AppCompat theme.
        For some reason, they already get the textColorPrimary
        when running on API 21, but not on older versions of
        Android, so this is only necessary to support older
        Android versions.-->
        <item name="actionMenuTextColor">@color/abc_primary_text_material_light</item>
  <!-- android:textColorSecondary is the color of the menu
       overflow icon (three vertical dots) -->
  <item name="android:textColorSecondary">@color/abc_secondary_text_material_light</item>

  <!-- This would set the toolbar's background color,
        but setting this also changes the popup menu's background,
        even if we define popupTheme for our <Toolbar> -->
  <!-- <item name="android:background">@color/color_primary</item> -->
</style>

This gives me the dark text and icons in my App Bar while using the dark theme:

screenshot_toolbar_dark_text_on_light_with_dark_theme_cropped

That’s actually gray rather than black, and the white icons are really off-white, so you might want to use a custom color to have real black or white standard icons:

<item name="android:textColorSecondary">@color/my_black_icon_color</item>

Notice that the <Toolbar> also uses popupTheme (app:popuptheme when using AppCompat, or android:popupTheme when targetting SDK >=21). Without this, the overflow menu’s appearance is affected by the Toolbar’s style, leading to dark text on a dark background:

screenshot_toolbar_dark_text_on_light_with_dark_theme_with_menu_without_popuptheme_cropped

By specifying the Toolbar’s popupTheme, we can make its menu use our normal theme instead:

screenshot_toolbar_dark_text_on_light_with_dark_theme_with_menu_cropped

[1] “App Bar” seems to be the new official terminology. It’s used here and some other places I can’t find now.

Also see my entry about changing the colors of your own action icons with Android 5.0’s drawable tinting feature.

Android Glom Experiments

Over the past few weeks I’ve been diving into Android development using a semi-realistic project to force me to learn properly. I wrote a rough first version of a read-only Glom database UI for Android, called android-glom. So now there’s a version in gtkmm (C++), Qt (C++), GWT (Java) and Android (Java). It’s a good way to really try out a framework and I’ve really enjoyed doing that with no pressure.

Here are some of my thoughts about the experience. I’d welcome feedback about the opinions I’ve formed and about the code I’ve written.

I’ve been doing this while reading O’Reilly’s Programming Android book which is pretty good. I had already read the Busy Coder’s Guide to Android Development a few years ago, which I also liked, but I didn’t realise until recently that it’s been kept up to date as a subscription, because Amazon only has the old edition.

Android Studio

I tried out Android Studio for this project. It’s not quite officially stable but I already find it preferable to Eclipse even though its UI is only slightly less cluttered than Eclipse. It has never asked me to choose a “Perspective”, which is nice. Like Eclipse, it has refactoring tools so you can move Java code around and rename stuff easily. I miss this now when I use C++.

Databases

Android doesn’t really support JDBC, making sure that you don’t even try to access an external database server on a tablet or handheld that probably doesn’t have a reliable connection. Those database servers are not meant to be exposed directly on the internet anyway. But it’s still annoying that have to use a similar-but-separate Android-specific and SQLite-specific database API (SQLiteDatabase, SQLiteOpenHelper and Cursor) instead, making code less portable.

Luckily I was still able to reuse much of my SQL-building and data-structure Java code from gwt-glom with just minor changes.

Activities and Fragments

Fragments are a fairly new way to let you rearrange your Android UI in various ways for different sized screens or different orientations. For instance a tablet UI might have one Activity that shows a list fragment at the left and a detail fragment at the right, depending on what item is selected in the list. But a handset version of that UI might open a second detail Activity to show that detail fragment, because it doesn’t have a big enough screen to show both at once.

Unfortunately, there are various official examples that use fragments to support both tablet and handet UIs in one app, but they don’t all use the same techniques or API. For instance, the “Building a Flexible UI” documentation instead suggests just replacing the one fragment in the one single activity for the handset UI and using FragmentTransaction.addToBackStack() so the back button works.

However, the Master/Detail new-activity template code used in Eclipse and Android Studio uses the multiple Activity idea (only one Activity is ever used in the Tablet UI), setting an mTwoPane boolean after detecting which XML layout file has been loaded. This works because you can specify separate layouts (or other resources) for Android to use depending on, for instance, screen size or orientation, and you just need to check what it has decided to use.

So this is the system that I’ve used, later checking that mTwoPane boolean when I want to navigate to another part of the UI, either telling the main Activity to do something with one of its fragments, putting the necessary parameters in a Bundle given to Fragment.setArguments() or just using startActivity() to start a new Activity with the appropriate parameters in its Intent. It’s slightly annoying that fragments take a Bundle but Activities take an Intent, with both having very similar but separate APIs.

Content Providers

Many parts of the Android API, such as ListView, ListFragment, and ListActivity, assume the use of a Cursor to access data, which in turn requires that you use a either a SQLiteDatabase or a ContentProvider.

The Android API documentation implicitly pushes you, via deprecation,  to use a  Content Provider, rather than just a SqliteDatabase, to separate your UI and data into separate processes even when you have no need to share your application’s data with other applications, even though the high-level documentation says “You don’t need to develop your own provider if you don’t intend to share your data with other applications.”

Specifically, you can tell your ListView, ListFragment, or ListActivity to show your SQLite database data via a CursorAdapter, such as SimpleCursorAdapter, which takes a Cursor. That Cursor can be the result of a SQLiteDatabase.query() or rawQuery(). But you’ll need to call Activity.startManagingCursor() on that Cursor and that is deprecated (probably because its not asynchronous) in favour of using CursorLoader (by implementing LoaderManager). And that means using a ContentProvider. See the “Running a Query with a CursorLoader” documentation. I wish that the documentation and examples just started off with this clear recommendation.

You can instead implement a custom CursorLoader that uses a SQLiteDatabase directly, but you then lose some functionality such as automatic ListView updating via notification when the data changes. And I think I’ve read of other ListView functionality that only works with a ContentProvider but I can’t find that documentation now. I think it was something about searching or auto-completion.

Content Providers are a bit awkard

Unfortunately a ContentProvider doesn’t provide quite as much loose binding as you’d hope. The ContentProvider API is very much like a SQL API. Most example code seems to just expose the SQLite database structure directly, sometimes with a simple mapping of column names as a thin separation. Given that this is the most common ContentProvider implementation that gets cargo-culted, it seems that it should be a lot less verbose.

(Update: I noticed that the mapping of external column names to internal columns names is useless anyway because you end up exposing the internal column names when your Content Provider’s query() returns the database query’s cursor as your Content Provider query()’s cursor. Client code will often then need those internal database column names to call Cursor.getColumnIndex() to then get the values in the columns. This is only a problem when you don’t specify specific columns, which would then be mapped by SQLiteQueryBuilder.setProjectionMap().)

I also don’t like how this forces so much implementation code to be forced into one ContentProvider API, separated only by switch statements in the query(), insert(), update() and delete() implementations. I’d like an easy way to delegate my various ContentProvider URL implementations to separate classes.

Here’s a link to my ContentProvider to show what I mean. It feels like a mess.

A database as a web service

On the other hand, it’s good that the ContentProvider provides a route to storing your data on the internet instead, maybe just caching it locally, without changing your UI code. For instance, using some RESTful service, whose API would closely match a database API.

In fact, I’d like some easy way to just expose a database on the web, with multiple user-level and table-level access control. I know that developers spend huge amounts of time implementing very specific “business logic” web APIs to hide their underlying databases, and I know that developers rightly fear anyone having direct access to their databases. But couldn’t it be done properly? I guess that most of these systems have much the same code with much the same security mistakes, just to put the names of their database tables and columns behind a few levels of programming language class names, method names and parameter names that provide just a thin sense of security and a token hint at modularity.

I’ve found a few systems that do this, but I have no idea of which ones are trusted and used much.